Packaging made me buy it
I would never spend so much on just one eyeshadow, let alone a shadow stick. So I've bought it with 35% off at TesterKorea. But packaging isn't all that, we need to look closer and see in the heart of this product. Is it all worth it? Not really, but I created 3 super cool fixes for this product! Ready for my review?!

Laneige - Two Tone Shadow Bar - No.1 Humming Coral
2g / $21.85 ibuybeauti / $24.10 TesterKorea
Perfect combination of point color that naturally tints the skin and shimmer lighting pearl base that illuminates skin! Two Tone Shadow Stick expresses even more attractive eye makeup with Two Tone Gradation. Artist’s color blending know-how for natural eye makeup. Optimal Two Tone color combination. Exclusive oblique cutting completes artist’s natural auto gradation Creamy texture without powder floating :including aloe-vera powder for sensitive eyes, it makes skin around the eyes moisturized and glowing ~
How to use
1. Eye Gradation: Direct point color to eye lashes. Apply as if pushing from outer corner of eyes to inner corner.
2. Eye gradation: Apply Two Tone Shadow Bar 2-3 times to inner corner and spread with finger to complete natural gradation.
3. Under the eyes: Apply base color till the 2/3 point from inner corner
4. Natural shade: Connecting 1/3 point from outer corner of under eyes and to the eye tail will make deep eye makeup

Packaging, Color and Texture
The packaging is beautiful! The bottom glass-like cube part shows the base color of the shadow and the Lit and top part are rose gold plastic. You push the white slide-thingy down to get the product out. The lit doesn't feel 100% secure, I would never just toss it in my bag like that. Always put it in a pouch.
The color is perfect, just as I hoped! It turn out slightly softer in color compared with the preview pictures from Laneige. This is truly my peachy-pink I've been so obsessed with lately!

Review
As you can see it doesn't apply so nice. So I looked at the "How to use" pictures to get the look they previewed. The inner corner part is the easiest haha. But the gradient over your entire lid and crease is impossible. If you have Asian eyes and you don't have a large eyelid area, then maybe... but it just doesn't work. as you can see I have hardly any color on my lid and crease. At first I pushed softly but later I tried to really chalk it on there but still hardly anything. So then the part where I line my eyes like they said. That went better since you see the line. It also got messy, since I had to hold the bar weird and it came on my lashes.
I really don't recommend these bars if you want to use these for a fast eyeshadow look.
I DO recommend these if you are ready to DIY a little and get yourself 3 new awesome beauty products!

Two new separate eyeshadows
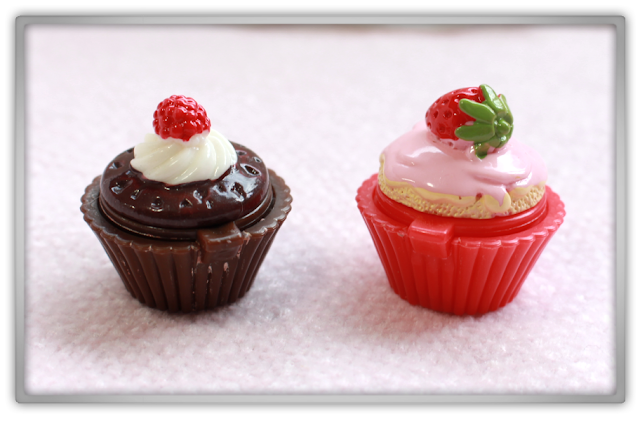
So I've created two separate eye shadows out of the bar. It's super simple, but it requires some precision and messing around :) I've used these cute (mega cheap) lip balm containers. You can buy these everywhere and way cheaper than on Ebay btw. The lip stuff inside stinks, just bought them for packaging :) So you also need a hair dryer, bamboo skewers (or something similar), and super thin knife. I used these nail art blades.
How to create no bar shadows ;)
1. Start with cutting off the bar when you have it out as far as it can.
2. Then divide the bar with the blades, try not to mix the colors.
3. Just put the chunks in the container you have, don't worry about how it looks now.
...Then you noticed there is a lot of product left inside, bad, very bad Laneige!
5. Take your bamboo skewers and start picking out the light shimmer color, since that takes the most of space and this way you don't rick ruining your base color.
6. When done pick out your base color and put it in the other container. Don't worry if you mix a tiny bit sometimes, you have more than enough ;)
7. Now stamp the shadow chucks a bit down, just so they don't peek over the edge of your container.
8. Place you container on / or against something firm so you don't need to hold it (hot!)
9. Take your hair dryer and let the it face the shadow directly from above. All the heat must be focused on the shadow inside. Turn your hairdryer on the highest heat and blow setting.
10. It takes for maybe 1 or 2 minutes to melt. When your surface turns into an even-non chunky liquid, you stop right away! It you continue you risk blowing out your eyeshadow.
11. Let is sit for a night, then the next morning it should look like... see next picture :)

New review
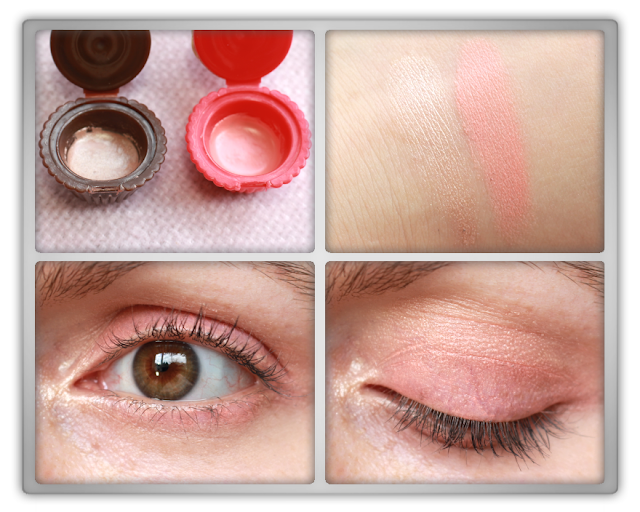
It looks so cute! So it applies best with fingers, I've tried different brushes, but the heat of your fingers work best to pick it up. I use my pinky to apply :) Also notice the 1-time swatch on my hand! It's way, way more smoother than the first time with the bar. With the bar you got little chunks!
Also I noticed application on my eyes was also way better, much more easy and smooth to apply. The gradation also is more natural and visible! I didn't do a line since I think that looks weird either way. A brown or black smooth line would look more natural. I really love these eye shadows now!
I was honestly never going to use that shadow bar after this review, since I hated it! But this way I really love it!
Do you want to know about my 3rd beauty product from this shadow bar?
Check out my next post:
I hope you've enjoyed and found my review helpful,
see you in my next post ;)


